

Data Filters
We will present two filter options that can be used in Power BI.
For clients with large volumes of data, we recommend using date filters in the API for data display. Loading APIs without date restrictions can lead to performance loss and even errors when trying to display data in Power BI. Below, we present two options:
- Fixed date in the URL;
- Incremental filter in Power BI.
1. Fixed Date in the URL
One solution is to set a fixed period directly in the URL used to connect to the OData feed. This way, the data is already loaded with a predetermined date limit.
For this, we use a generic filter like the following:
= OData.Feed("https://api.mercadoe.com/boost/v1/[Table-name]?$filter=[SentDate or CreatedDate] gt cast(2023-09-01T23:59:59.99Z,Edm.DateTimeOffset)", null, [Implementation="2.0", Timeout=#duration(0,4,0,0)])
❗️ Attention
The Timeout duration in the above filter version is 4 hours. In previous versions, it was 300 seconds, which caused update errors with large volumes of data.
This filter is created for each table, where a period for data loading is also specified.
The filter is customized for each client because each Dashboard has various tables configured with date fields that vary between SentDate or CreatedDate.
Tables with date filters in the API are:
- ContractItems
- Orders
- OrderItems
- OrderItemRequests
- PreOrderItems
- PreOrderItemRequests
- RequestItems
- Rfqs
- RfqItems
- RfqItemRequests
2. Incremental Filter in Power BI
Prerequisites
- To use the incremental refresh feature in Power BI, you need to have at least one Premium per-user license or higher.
- Additionally, a gateway needs to be installed, either locally or on a server. If you don't have one, click here to install it.
About the Incremental Filter
Power BI Premium allows for incremental data loads. This way, you can set a data retention period and limit the update check period, ensuring faster refresh rates.
We will provide a json file with the configured incremental filter in the client area. Download this file, and to install it, follow the tutorials below for creating a Workspace and a Dataflow:
Click here to create the Workspace
Tutorial for Creating the Workspace
1. In Power BI, click on Workspaces > + New Workspace.
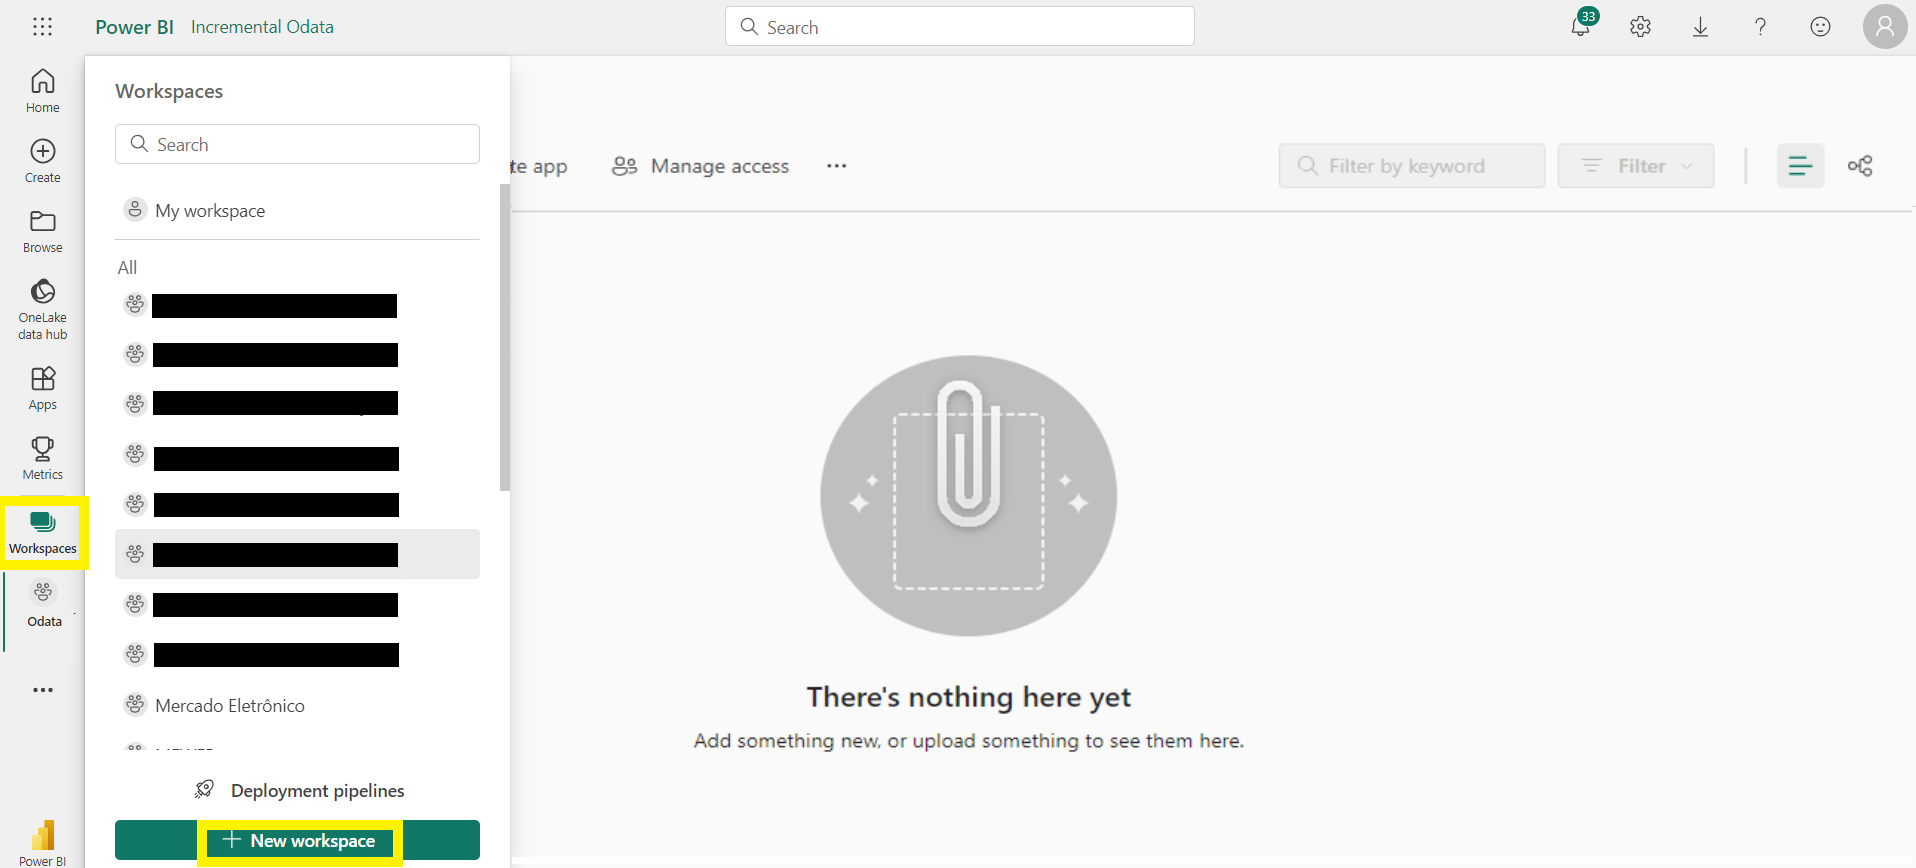 Figure 1. Power BI screen > Workspaces > + New Workspace
2. On the Create a workspace screen, fill in the Name and Description. We suggest using the generic name “Incremental OData”. This will prevent you from having to redo the connections in all model Dashboards, as they are considering this name and path.
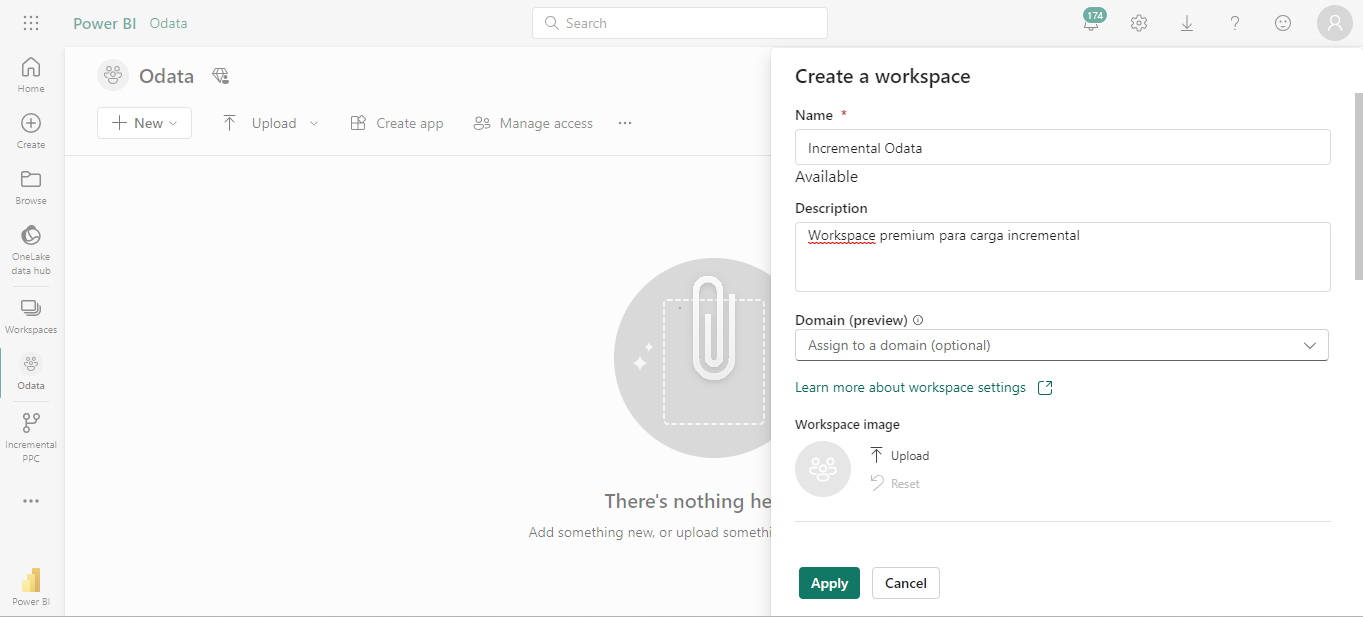 Figure 2. Power BI screen > Create a workspace
3. Still in Create a workspace, under License mode, select the Premium per-user option and click Apply to create the Workspace.
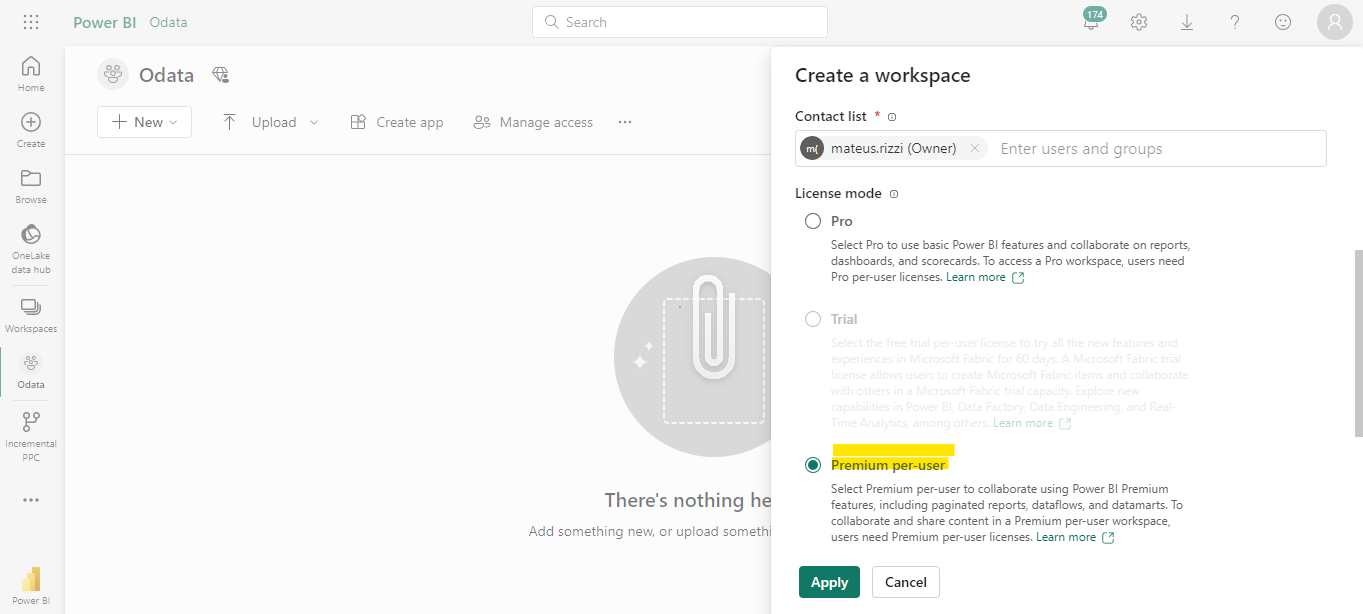 Figure 3. Power BI screen > Create a workspace > License mode
4. Verify that the Workspace for incremental load has been created.
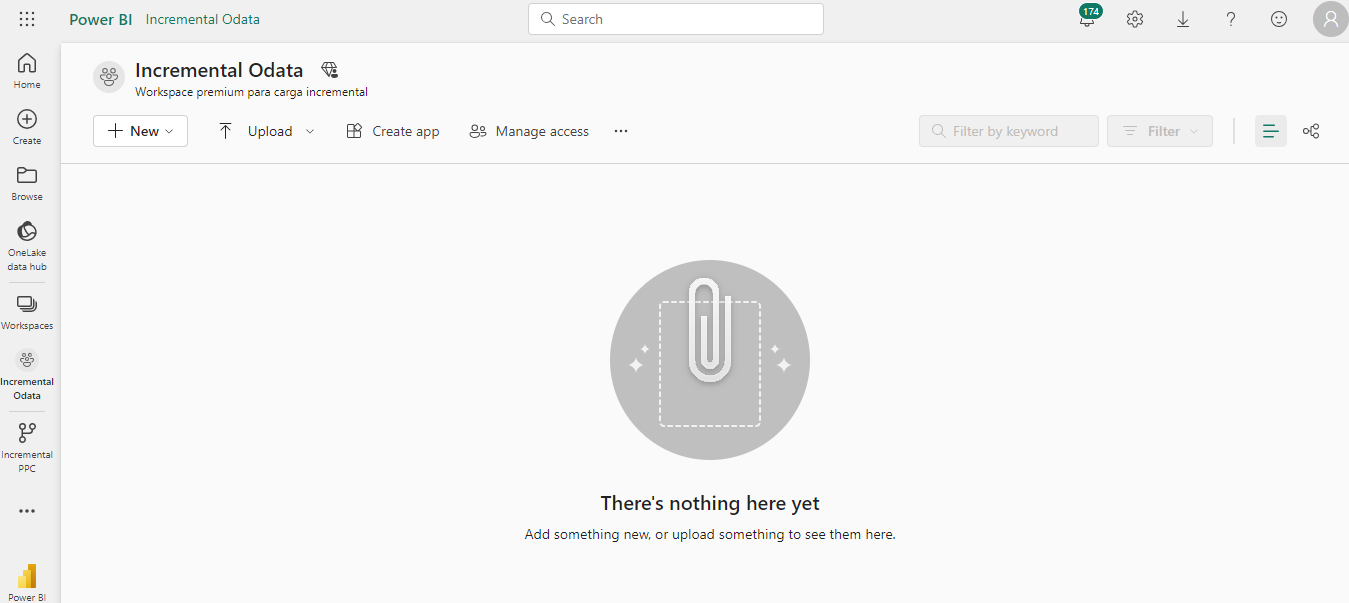 Figure 4. Power BI screen > Workspace for incremental load created
Click here to create the Dataflow/ Dataset
Tutorial for Creating the Dataflow/ Dataset
After creating the Workspace, create a Dataflow as follows:
1. Click on Incremental OData > +New > Dataflow:
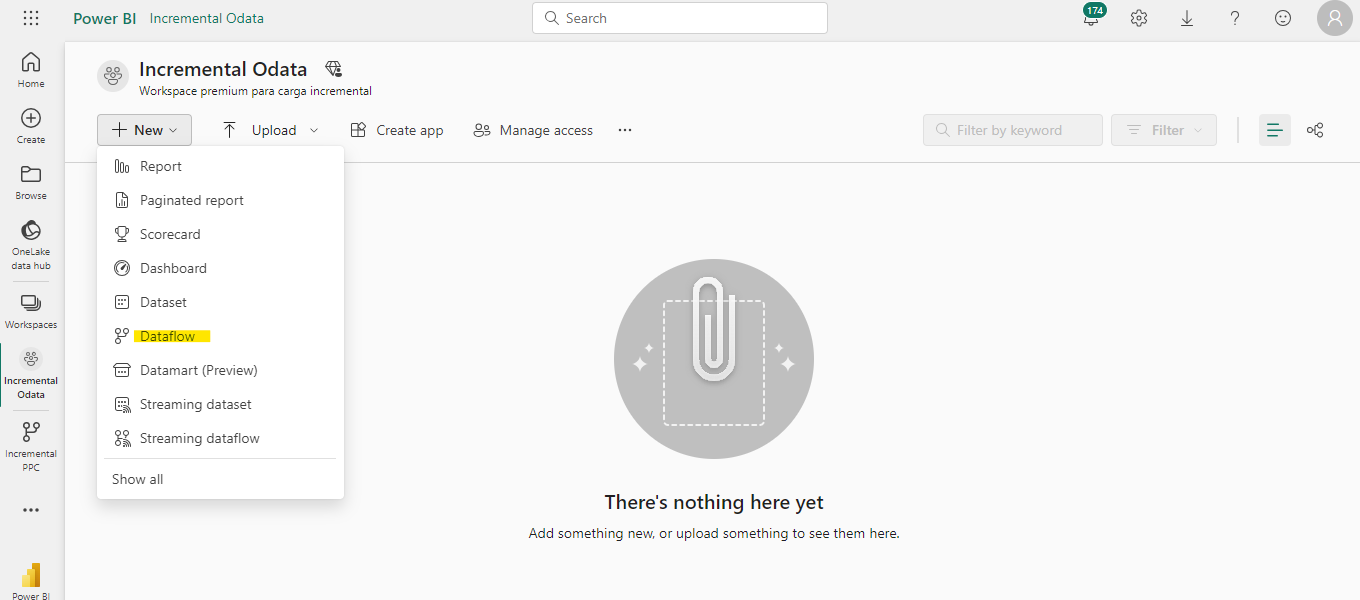 Figure 5. Incremental OData screen > +New > Dataflow
2. In the window that opens asking: “Want to build a datamart (preview) instead?”, click "No, create a dataflow".
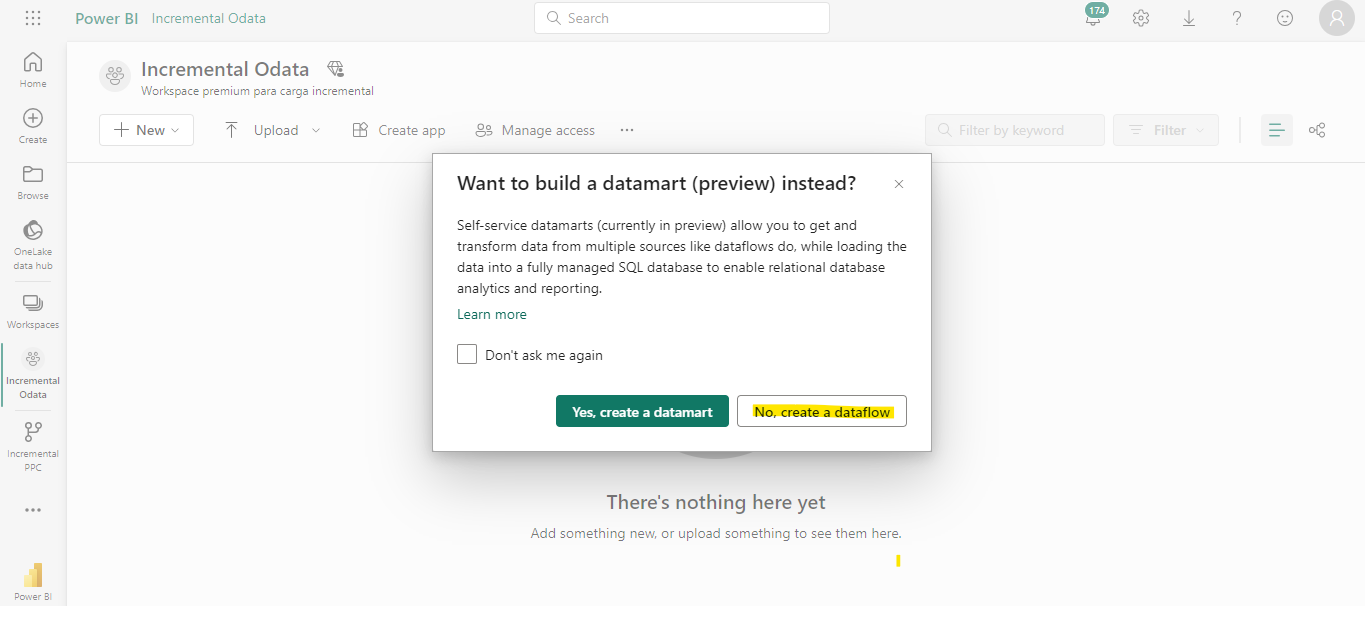 Figure 6. Incremental OData screen > Create a Dataflow
3. Power BI will show the Import Model option for importing the Dataflow in json provided by ME. Select the file from the folder where you saved it.
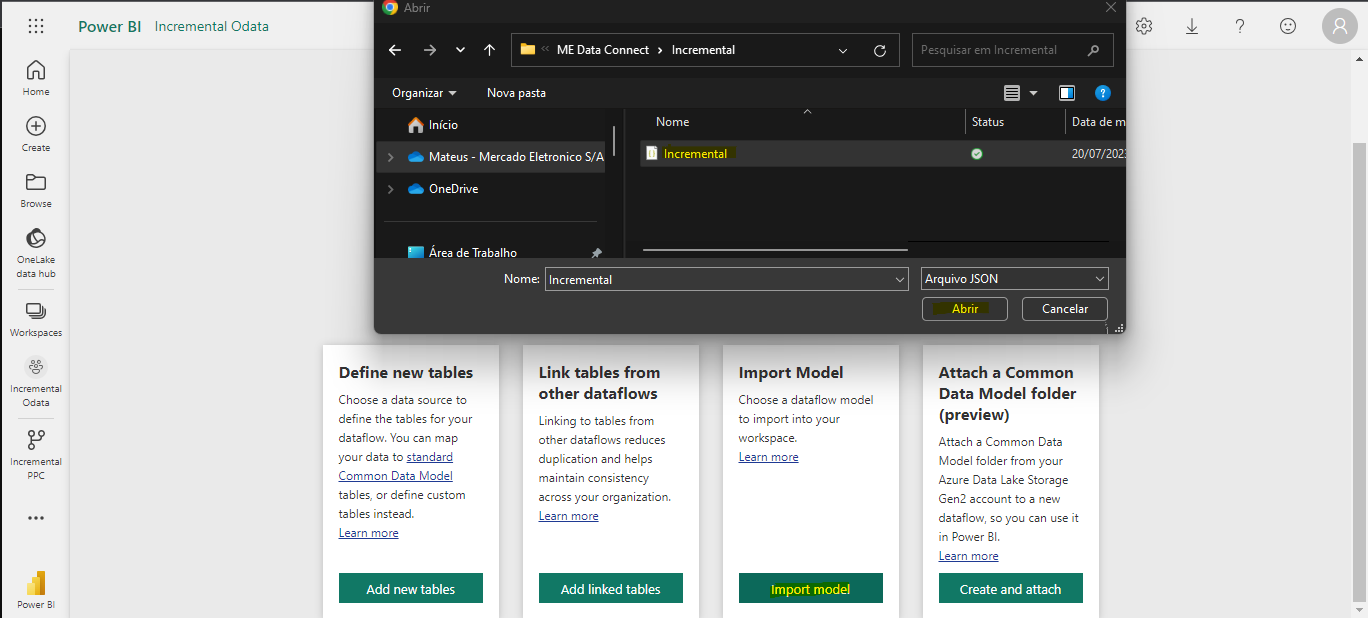 Figure 7. Incremental OData screen > Create a Dataflow > Import Model
4. At this point, if you are a new client, the system will request your ME access credentials to add them to Power BI. If you already have saved credentials, the system will identify them and only offer the option to edit. For more information, see Credentials.
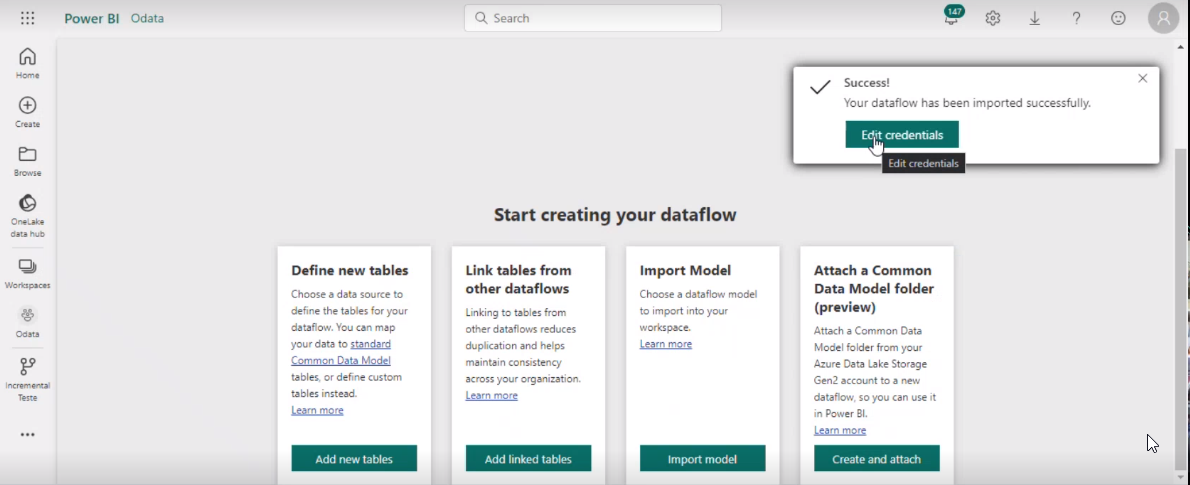 Figure 8. Incremental OData screen > Create a Dataflow > Import Model > Credentials
5. With the credentials provided, the system will import your file as shown in the image below.
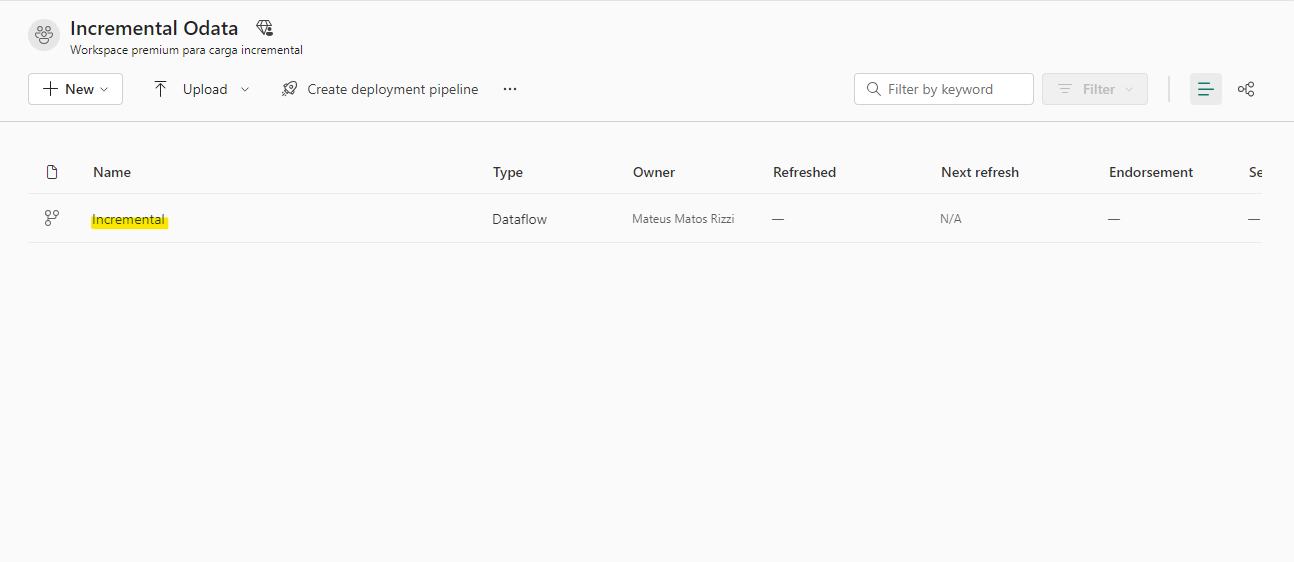 Figure 9. Imported Dataflow file
6. The first data load may take longer. After the initial load, simply plug the Dataflow into your Dashboard by specifying your Dataflow as the source.
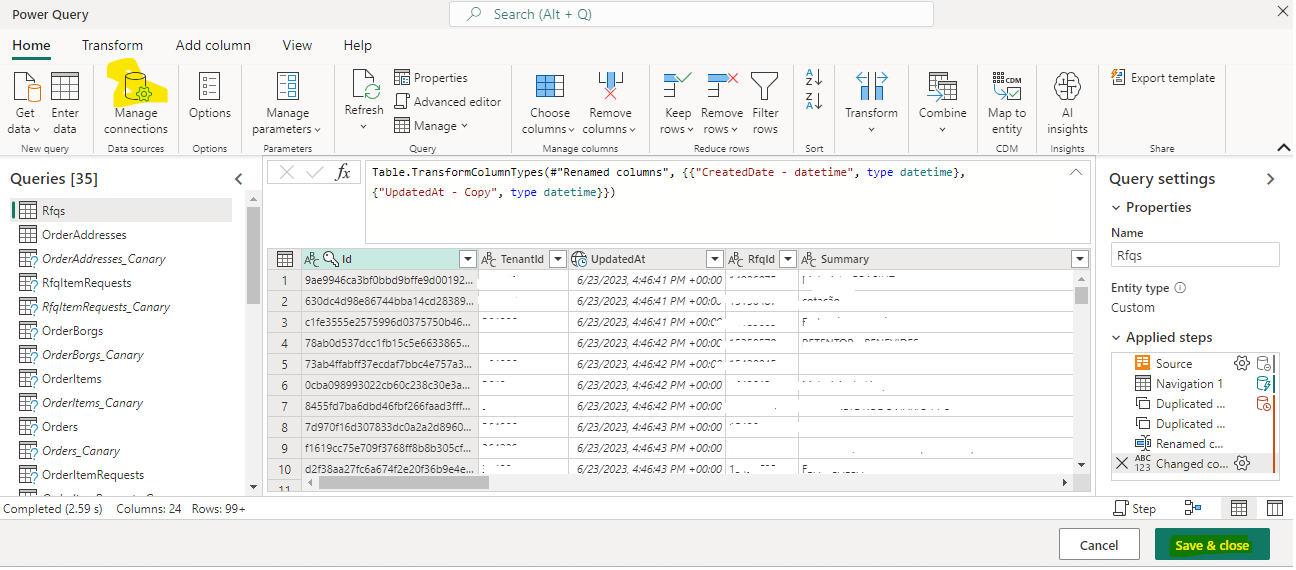 Figure 10. Data loaded into the Dashboard
Click here to update the incremental filter
How to Update Incremental Filter Settings
If you want to make any modifications to the incremental date filter, click on the file you imported and, for each table, you can click on the settings and update the period to be loaded as shown in the image below:
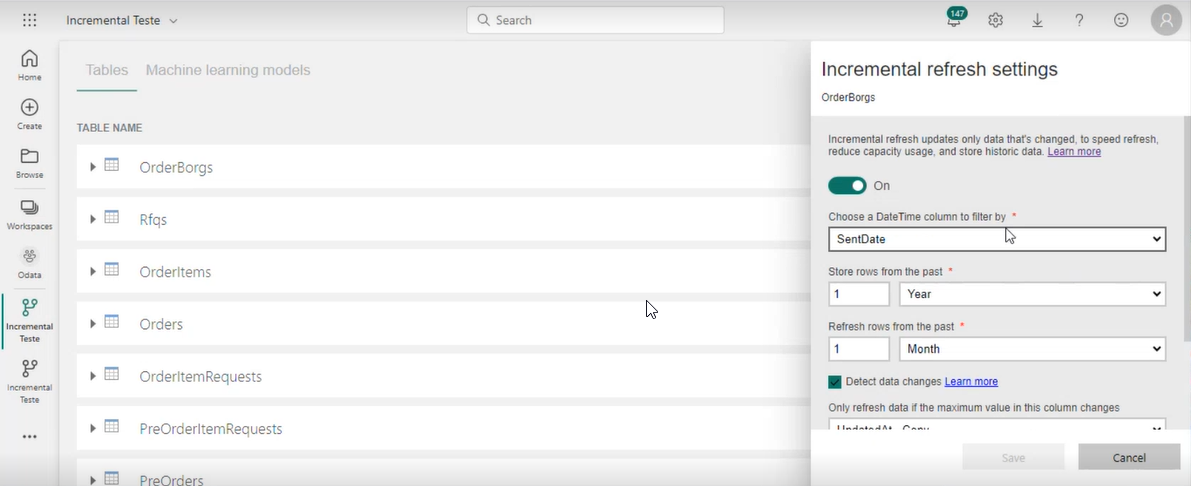 Figure 11. Incremental filter update screen
Click here to bring more tables into the Power BI panel
Tutorial for Bringing Tables Not Visible in the Panel
You may occasionally want to bring in an additional table to your dashboard. Follow these steps:
1. Click on Home > Transform Data:
 Figure 12. Screen with the Transform Data option selected
2. Click on New Source > OData Feed:
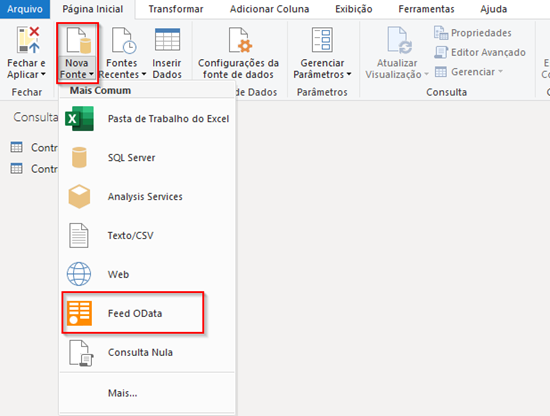 Figure 13. Options available in "New Source"
3. In the window that opens, enter the API address: https://api.mercadoe.com/boost/v1 and click OK:
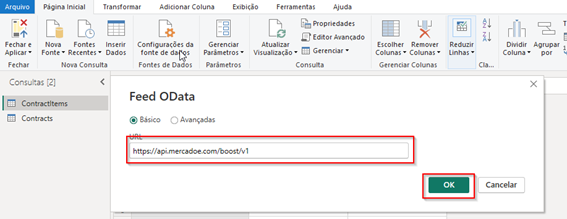 Figure 14. Window to enter API URL in New Source > OData Feed
4. Select one or more tables of interest and click OK:
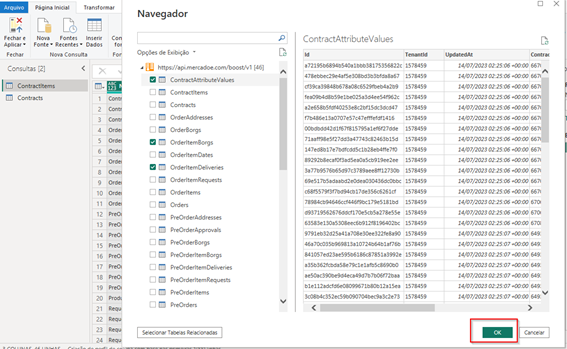 Figure 15. Selection of tables to be added to the panel
5. Then click Close & Apply:
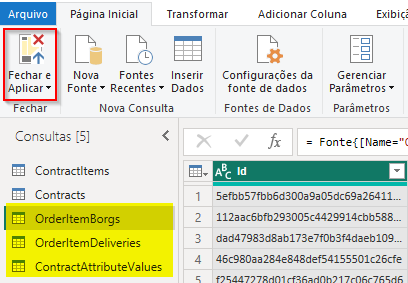 Figure 16. Screen with the Close & Apply option selected to save your changes