Synchronous Request
With the synchronous request, the requester will be notified of success or failure at the time of attempting to create a request.
The goal of the Synchronous Request for integrated clients is to allow the requester to validate the success or failure of the request creation directly on the screen.
The user is notified in case of a possible rejection or issue, thus avoiding inconsistent errors that could be detected too late.
How the Synchronous Request Works
In this section, you will be able to review the operation of the synchronous request generally and in detail through the images and description of the steps that will be presented subsequently.
Overview of the Synchronous Request
Detailed View of the Synchronous Request
Check the detailed flow of the synchronous request with emphasis on the roles of the Front-end and Back-end. In this image, you can also see the actions that occur in the Client and in the ME.
Description of the Synchronous Request Steps
- The Requester fills in the request creation data via the screen in the ME;
- The Requester waits for the screen return while the ERP/System is trying to connect with the ME;
- From this moment on, the ME sends the
prerequest.submittedwebhook to notify the attempt to create the request to the integrated ERP/System; - The ERP/System performs a GET Get a pre-request based on the preRequestId of the request information and performs the necessary validations;
- Then the ERP/System can follow 2 paths:
- Performs a
POSTfor request approval: when it returns that everything is fine, through thePOSTendpoint Approves a pre-request. - Performs a
POSTfor request rejection: when there are errors, informing which fields and what the errors were, through thePOSTendpoint Reject a pre request based on the pre request Id and body information.
- The back-end passes this information to the service that the front-end will consume;
- The front-end of the ME displays the request successfully created, or shows information that the request was NOT created if there are fields with errors to be corrected;
- The Requester makes corrections if there are any fields with errors and resubmits the request.
📘 Note
The endpoints related to the attempt to create the request are named "Pre-request" (Pre-request) not because it is a different document, but rather as an intermediate process in the creation of the request.
Synchronous Request Steps on the Front-end
The front-end receives the information of success or error in processing a request to display to the end user.
Step-by-step on the ME front-end:
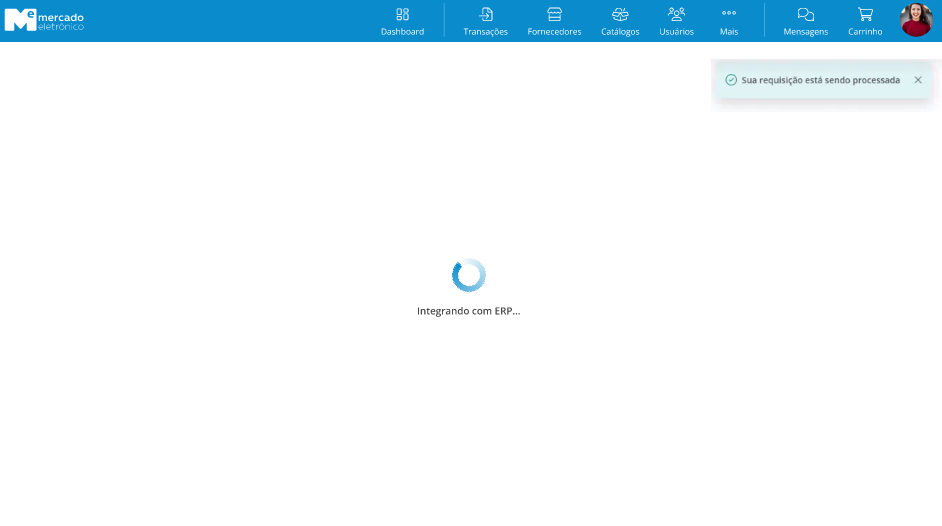
1. The requester fills in the request creation data via the screen, completing the necessary information for each item, as shown in the following screen:
2. The requester clicks Next and is informed that the request is being processed. During these seconds, integration with the ERP/System occurs.
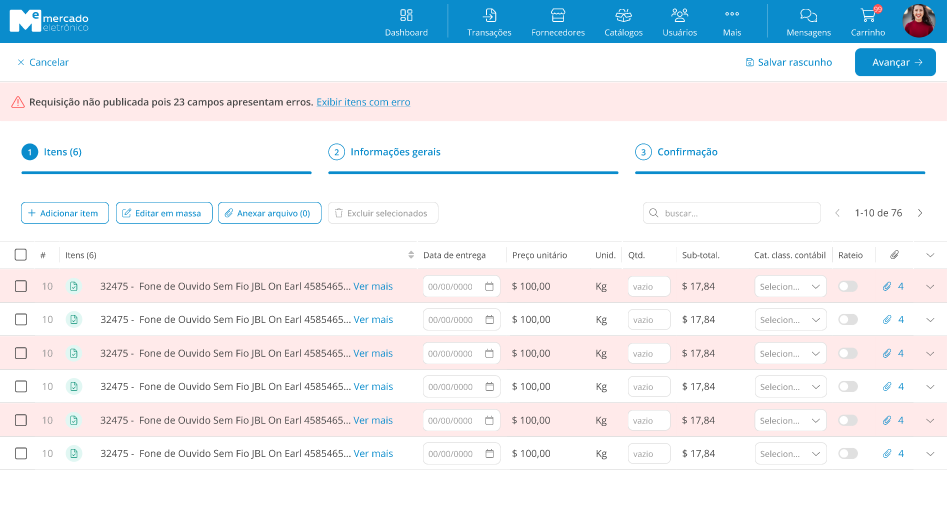
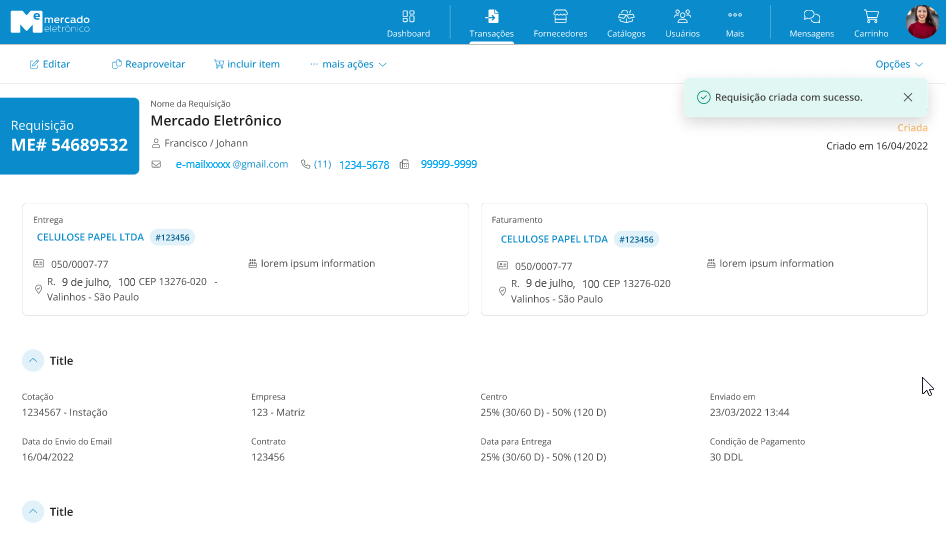
3. Next, the front-end returns the request screen indicating errors in the items or may return the screen with the request successfully published.
3.1 On the next screen, there are fields with errors, and thus, the request was not published. You can expand each item to see what these errors were and in which fields.
3.2 On the next step, the request was successfully created.
Drafts
All request creation attempts that failed for some reason are saved in the Drafts list. This includes requests that were not created due to fields with errors or requests that started being filled but were not yet submitted, due to connection issues, for example.
Drafts of request creations will be maintained until you finish filling them out or correcting them and resubmit. When the request is finally created, the draft will be deleted.